With spring just around the corner, you’re probably on the lookout for an icy alternative for your coffee. Well, with more caffeine than drip coffee, and being able to last up to 2 weeks in the fridge, Cold Brew is a fantastic choice.
What is it?
Cold brew is a brewing method that, like the name states, involves no heat. So what does that change? Actually quite a bit. Using heat allows you to extract all of the flavors very quickly, which is why its most popular. However, if you want to brew cold, you have to steep the grounds in water for a much longer period of time. Twenty hours in fact. This process of slow brewing doesn’t extract many of the harsher flavors in the bean, creating a taste thats light and sweet. But the benefits don’t stop there. A long brew also means that the final product will have a much higher caffeine content. So you are guaranteed to get the most out of the nice weather.

What you need
As always, you want to start with the best ingredients. That means high quality beans and filtered water. Getting your beans from Black Turtle Coffee is an easy way to guarantee premium coffee. You’ll also need something to brew in. A cold brewer makes it easy, but a large mason jar works too, and we’ll walk through what to do for both methods. If you are using a mason jar, you will also need a way to filter off the grounds, so you can use cheese cloth or a coffee filter.
Step 1: Grind Coffee
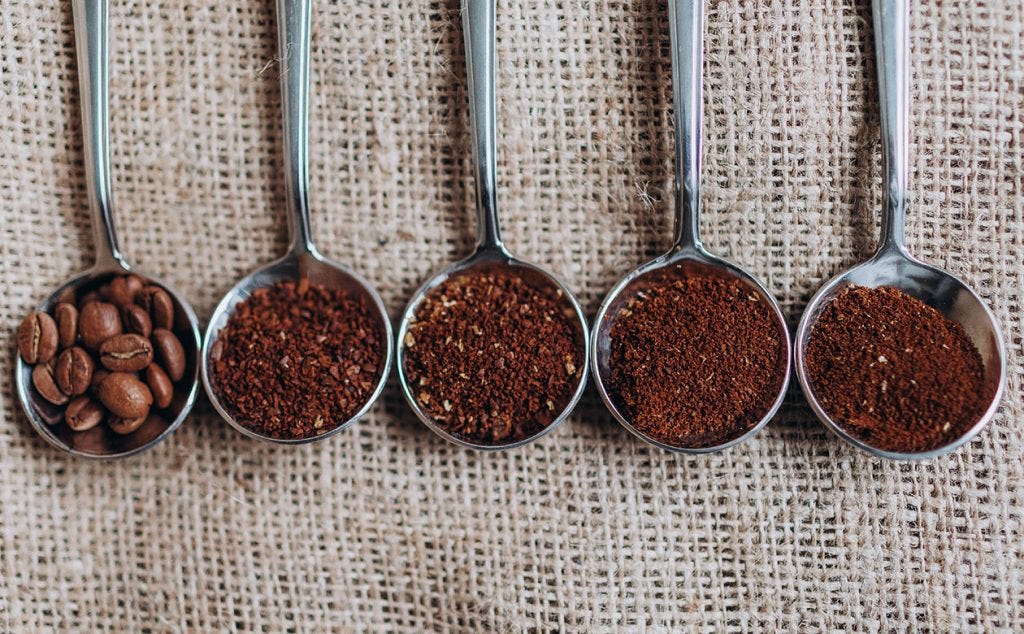
For cold brew, you’ll need to grind your coffee slightly coarser than drip coffee and for reference, it should be the size of cornmeal.

Step 2: Fill Your Container
You will need the right ratio of grounds to water which is about 1:4. Measure out how many cups of water it takes to fill your your container 2/3 of the way. Divide that number by four to know how much grounds you should use. For example, if your container 2/3 full at 8 cups, you’ll need 2 cups of grounds.
Step 3: Add Your Grounds
For Cold Brew maker: Cold Brew makers come with a convenient mesh insert for your grounds, so carefully add your grounds to the insert. Designs vary, but many will have a way to secure the insert to the lid in some way, so make sure it is attached properly if this is the case. Slowly lower the insert into the container of water and stir until all the grounds are wet.
For Mason Jar: There will be an additional step of filtering off the grounds Add your grounds directly into the container of water and stir until all the grounds are wet.
Step 4: Cover and Refrigerate
Put the lid on your container and put in the fridge for 20 hours. However, if you want your cold brew a bit stronger, you can let it steep for up to 24 hours.
Step 5: Filter and Enjoy
Now that your Cold Brew is ready, you’ll need to remove the grounds. With a Cold Brew maker, this is easy since all you need to do is remove the mesh insert that is holding them. However, if you used a mason jar it’ll take a little more work. Start by placing your cheese cloth or coffee filter in a sieve and put it over another large container. Slowly pour your Cold Brew through. Once filtered, keep refrigerated and enjoy for up to 2 weeks.
Tips
If your Cold Brew is too strong, feel free to dilute with water or milk. However, make sure to dilute each individual portion since diluting the main batch will drastically increase the rate at which it goes stale.
If you want to add ice to your Cold Brew, consider making coffee ice cubes so it doesn’t get watery.
Visit our website at www.blackturtlecoffee.com and follow us on Instagram @blackturtlecoffee to learn more and order freshly roasted beans.

